
The Stardew Valley Seed Maker in One Number: 51%
Most guides will tell you the seed maker turns crops into seeds and leave it there. Technically true. Also about as useful as saying a keg turns fruit into liquid. Because the interesting part isn’t what it does. It’s what it costs. Every crop you feed this thing is a crop you didn’t sell, and there’s an actual number attached to that trade – a number most players never look at before they build twenty of these and start shovelling their whole harvest in. To avoid buying new seeds entirely, you’d need to sacrifice an average of 51% of your harvest for a Stardew Valley seed maker. That’s straight from the wiki’s own math, and it falls out of the drop rates. Put a crop in, and 97.51% of the time you get 1 to 3 seeds of that same crop back, averaging out to 2 seeds. Do the division – 1 divided by (0.9751 × 2) – and you land on roughly 51%.
Half your crop. Gone. Forever. To keep the cycle running without spending gold at Pierre’s.
Now, before anyone panics: that trade is sometimes brilliant and sometimes terrible, and the whole skill of using this machine is knowing which is which. But you can’t make that call without the number in front of you.
| Outcome | Chance | What you get |
|---|---|---|
| Same-variety seeds | 97.51% | 1-3 seeds, averaging 2 |
| Mixed Seeds | 1.99% | 1-4 packets |
| Ancient Seeds | 0.5% | 1 packet |
That 0.5% row is doing an enormous amount of work in the late game, and we’ll get to why. But first, the basics, since half the confusion around this machine comes from people not knowing what it will and won’t accept.
Getting Your First Stardew Valley Seed Maker
Three routes in, and most players stumble onto one of them without planning it.
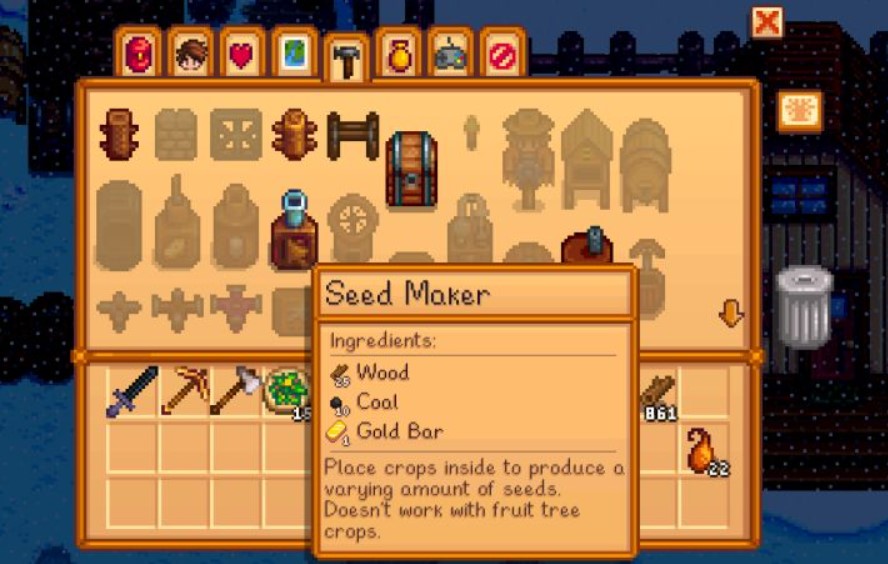
Crafting. The recipe unlocks at Farming Level 9, and it wants 25 Wood, 1 Gold Bar, and 10 Coal. That’s a cheap recipe by late-game standards, which is exactly why people end up with rows of these things.
The Dye Bundle. One free seed maker for completing the Dye Bundle on the Bulletin Board – Red Mushroom, Sea Urchin, Sunflower, Duck Feather, Aquamarine, and Red Cabbage. Unlike some bundles where you pick from a longer list, you need every one of these.
Skull Cavern treasure rooms. They show up in there occasionally. Not a plan, just a nice surprise.
The crafting route is the one that matters, because you’ll want more than one eventually and Farming 9 arrives comfortably within the first year if you’re actually farming rather than fishing all spring.
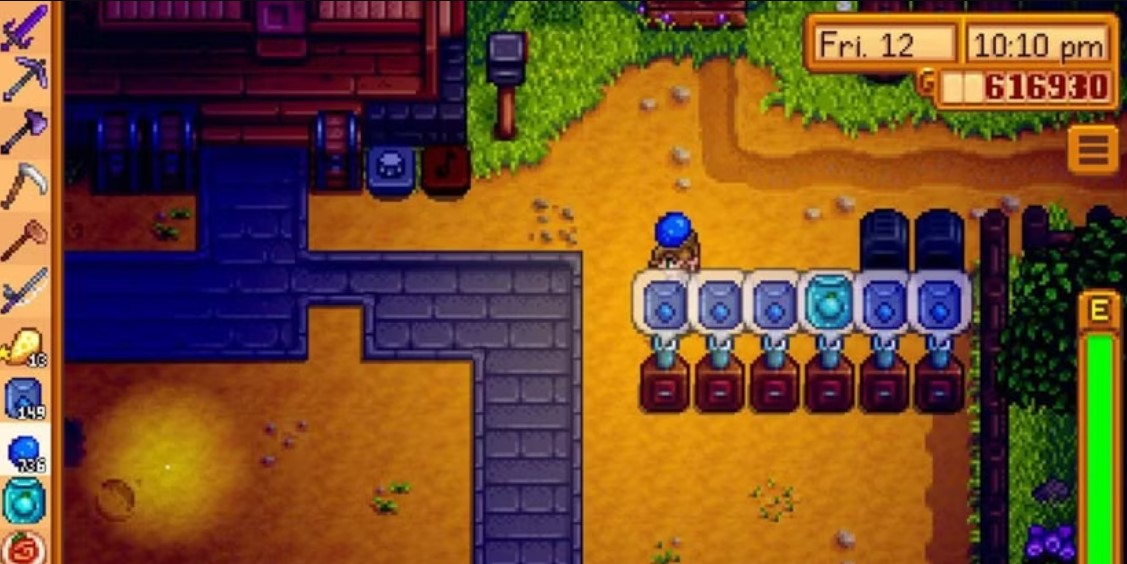
Once it’s down, using it is trivial. Walk up holding a crop, interact, wait 20 minutes of in-game time, collect. That’s the whole interaction. There’s no upgrade, no fuel, no quality tier.
Two things it accepts that surprise people: four specific foraged items work, namely Wild Horseradish, Spice Berry, Common Mushroom, and Winter Root. And since version 1.3.27, Cactus Fruit goes in and comes out as Cactus Seeds, whether it was foraged or farmed.
Everything else on the forage list is a no. So is fruit from fruit trees. The full rejection list runs: Blackberry, Coconut, Coffee Bean, Crocus, Crystal Fruit, Fiddlehead Fern, fruit tree fruit, Salmonberry, Sweet Pea, Tea Leaves, Wild Plum, and anything else labeled “Forage” in-game.
Don’t feed it your apples. It won’t tell you off, but nothing useful happens.
Now the Decision: When Is 51% a Good Deal?
Right. Armed with the number, let’s actually think about this, because the answer changes completely depending on what’s in your hand.
The core question is simple: what does a seed of this crop cost to buy? If seeds are cheap and the crop sells for a lot, giving up half your harvest to skip a small purchase is a bad trade. If seeds are expensive or genuinely unbuyable, the calculation flips hard.
Run through the categories.
- Cheap seasonal crops – bad trade. Parsnips, potatoes, corn, whatever’s stocked at Pierre’s for a couple hundred gold. You can just buy these. Feeding half your harvest into a machine to save a trivial purchase is losing money with extra steps and extra clicking.
- Expensive purchasable crops – situational. Starfruit and Sweet Gem Berry sit at the awkward middle. Seeds cost real money, so duplication has genuine value, but you’re also giving up half of a very valuable harvest to get there. Worth doing when you’re cash-poor and want to scale a Starfruit operation without draining your wallet at the Oasis. Less worth it once gold stops being a constraint.
- Unbuyable crops – obvious yes. This is where the machine stops being optional. Some things simply can’t be purchased at any shop, and the seed maker is the only way to multiply them.
- Crops you want to expand aggressively – yes, temporarily. A useful mindset shift: think of the 51% as an investment period rather than a permanent tax. Feed heavily for a season while you’re scaling up a field, then stop feeding once you’ve got enough plants and pocket the full harvest from then on. People treat this as a permanent setup when it’s really a ramp.
That last point is the one I’d underline. The seed maker is a growth tool, not a steady state tool. Once your greenhouse is full and your fields are planted, the machine’s job is done and every crop you keep throwing in is pure loss.
The Ancient Fruit Engine, or Why the Stardew Valley Seed Maker Matters at All
Everything above is preamble. This is the actual reason this machine has a reputation.
Ancient Fruit is the crop the seed maker was made for, and the loop goes like this. You donate an Ancient Seed artifact to the Museum, Gunther gives you a packet of Ancient Seeds plus a crafting recipe for turning future artifacts into seeds. You plant that single seed. Twenty-eight days later you get an Ancient Fruit. You put the fruit in a seed maker and get more Ancient Seeds. You plant those.
Do that for a while and you’ve bootstrapped an entire Ancient Fruit farm from one seed.
What makes the loop actually work is the crop’s own behaviour. Ancient Fruit grows in Spring, Summer, and Autumn – or all year round in the Greenhouse – and after that initial 28-day growth it resprouts new fruit every 7 days from the same plant. So each mature plant becomes a fruit generator, and each fruit becomes potential seeds. That’s the compounding engine that turns a single museum reward into the most profitable operation in the game.
A few practical notes on running it:
- The 51% rule applies here too, but only while you’re scaling. Once your greenhouse is packed, stop feeding fruit to the machine and sell it or keg it instead.
- Ancient Seeds can go in the greenhouse and grow year-round there, which is why the greenhouse is the natural home for this crop.
- They won’t go in Garden Pots. The game gives you a lovely little refusal message about her roots growing too deep to be happy in there.
- Seed-maker-produced Ancient Seeds can’t be donated to the Museum. Only the artifact version counts, so don’t hold onto them expecting a museum slot.
- The Agriculturist perk at Farming Level 10 speeds crop growth by 10%, which compounds nicely across a large Ancient Fruit operation.
And here’s the sneaky part. That 0.5% Ancient Seeds chance? It applies when you put in any crop other than Ancient Fruit. Which means every blueberry, every pumpkin, every cranberry you run through a seed maker is a lottery ticket for the game’s best crop.
A Steam discussion thread on this has one player reporting the practical version of that math: roughly 5 Ancient Seeds per 1000 crops processed, which tracks with the 0.5% rate. Their setup involved something like 30-plus seed makers arranged near the tunnel entrance, feeding a thousand crops through in about a full in-game day. That’s the brute-force approach, and it works, though whether you find it fun or find it a second job is a personal question.
The Exploit That Died in 1.6
Worth knowing about, because you’ll still find old guides and forum posts describing it as if it works.
For years, the type and number of seeds produced was determined by the time of day and the location of the seed maker. That’s not a random roll in the usual sense – it’s a deterministic calculation, which meant it could be gamed.
Players went deep on it. That same Steam thread from 2017 has someone reverse-engineering the formula with a spreadsheet, working with something along the lines of days played, plus save ID divided by two, plus the machine’s x coordinate, plus 77 times the y coordinate, plus the time in military format. They were arriving at strange summation values and trying to correlate them with Ancient Seed outcomes.
That’s the level of dedication we’re talking about. Someone built a spreadsheet to predict lottery tickets in a farming game.
Version 1.6 changed the game’s randomization and removed seed maker output exploits. Whatever position-and-timing tricks existed before, they’re gone.
One consequence that’s still true regardless: the outcome is not affected by your luck stat. Lucky days don’t help. Special Charm doesn’t help. Coffee doesn’t help. If you were saving your good-luck days for a big seed maker session, you can stop.
Mistakes Worth Not Making
A quick tangent into things I’ve watched people do, including myself in an earlier save.
- Building twenty seed makers on day one of unlocking them. Extremely satisfying. Rarely necessary. Unless you’re doing the brute-force Ancient Seed lottery, a handful covers the actual duplication you’ll do, and every machine costs a Gold Bar.
- Feeding gold-star crops in. The output doesn’t care about input quality. A gold-star Starfruit produces the same seeds as a regular one, and gold-star crops sell for substantially more. Sell your best, seed your worst.
- Running the machine forever. Covered above but worth repeating, because it’s the single most common efficiency leak. The 51% cost never goes away, but the reason for paying it does.
- Expecting it to work with things it doesn’t. Fruit tree fruit is the big one. People plant an orchard, harvest a hundred apples, and try to seed-maker their way to more trees. Doesn’t happen – saplings come from Pierre’s.
- Treating it as an income source. It isn’t one. It’s a supply chain step. The money comes from what you plant afterward, and confusing those two leads to a lot of crops sacrificed for no gain.
| Crop situation | Feed it? |
|---|---|
| Cheap seeds at Pierre’s | No – just buy them |
| Starfruit while short on gold | Yes, temporarily |
| Ancient Fruit, still scaling up | Yes |
| Ancient Fruit, greenhouse already full | No – sell or keg it |
| Gold-star anything | No – sell it, seed the regulars |
| Random surplus crops, hunting Ancient Seeds | Yes, if you enjoy the grind |
| Fruit tree fruit | Can’t – not accepted |
FAQ
How do I unlock the Stardew Valley seed maker?
The crafting recipe arrives at Farming Level 9 and needs 25 Wood, 1 Gold Bar, and 10 Coal. You can also get one free from the Dye Bundle, or find one in a Skull Cavern treasure room.
How many seeds do I get per crop?
Usually 1 to 3 of the same variety, averaging 2, at a 97.51% rate. There’s a 1.99% chance of 1 to 4 Mixed Seeds and a 0.5% chance of a packet of Ancient Seeds.
Does luck affect the seed maker?
No. The outcome is unaffected by your daily luck, and 1.6 changed the randomization to remove the old output exploits, so timing and placement tricks no longer work either.
Can I put fruit tree fruit in it?
No. Apples, peaches, and the rest are rejected, along with most forage. The exceptions are Wild Horseradish, Spice Berry, Common Mushroom, Winter Root, and Cactus Fruit.
Is it worth using on cheap crops?
Usually not. You give up about half your harvest to skip a purchase that costs almost nothing. Save the machine for expensive or unbuyable seeds.
Can seed maker Ancient Seeds be donated to the Museum?
No. Only the Ancient Seed artifact counts for the Museum. Seeds produced by the machine are for planting.
How long does it take to process?
Twenty minutes of in-game time. Fast enough that you can drop a crop in, do something else nearby, and come back for it in the same trip.
The Short Version
Everything about the Stardew Valley seed maker comes back to that one figure. You’re paying 51% of a harvest for independence from the seed shop, and whether that’s a bargain or a waste depends entirely on what the shop charges. For parsnips, it’s a waste. For Ancient Fruit – a crop no shop stocks at any price, that regrows every seven days, and that can be bootstrapped from a single museum reward – it’s the best deal in the valley. Build a few, use them hard while you’re scaling, then stop. The machine’s job is to get your farm somewhere, not to keep running once you’ve arrived.
P.S. If the 51% figure was news to you, chances are it’s news to someone on your feed too, and sending this their way is the simplest kindness you can do our small team. Bookmark it as well, because this is exactly the sort of thing you’ll want to re-check the season you finally start your Ancient Fruit greenhouse. And if creative or commercial collaboration is on your mind, a direct note to the Lizet Manski team always finds a reader.