
Anatomy of a Bandit Camp in Horizon Zero Dawn
Here’s something you notice around your third one. They’re all the same building. Not literally – the ruins differ, the layouts sprawl in different directions, the weather changes from permanent thunderstorm to sandstorm depending on where you are. But underneath, every one of these places is assembled from the same handful of components. Rings of spikes. Watchtowers with a shooter in each. One alarm. Two prisoners in cages. A loot pile somewhere central. Learn the components and you stop approaching each camp as a fresh puzzle. You start approaching it as a checklist. So let’s take one apart.
Every bandit camp in Horizon Zero Dawn is built from six recurring parts. Once you can spot all six from the ridge outside, you’ve basically already won.
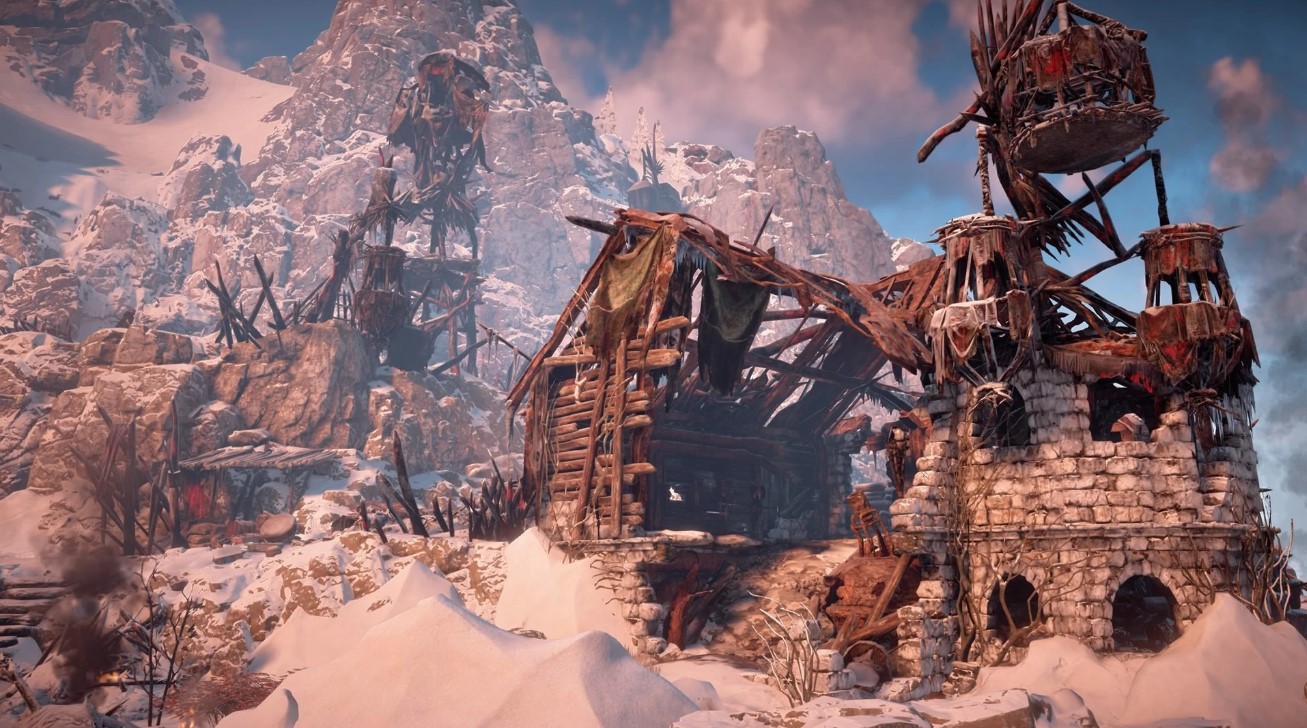
- The spike rings. You can identify these places from a long way off by the perimeter of large spear rings surrounding them. Most camps have two concentric rings at ground level, with gaps at the main trail entrances. Those gaps are the obvious way in, which is exactly why they’re guarded – and exactly why you often shouldn’t use them.
- The watchtowers. Usually two or more, each with a shooter who has line of sight over a big chunk of the interior. These are your first targets, always, because a tower sniper is the thing most likely to spot you mid-approach and turn a stealth run into a brawl.
- The alarm. One per camp, and it’s the single most important object in the place. Trigger it and it doesn’t just alert the camp – it summons additional bandits into the area. Disabling it is trivial: shoot it with an arrow. In some camps the game literally highlights it for you during the intro.
- The prisoners. Two, typically, held in cages. Walk up and hold the button to free them. Here’s the thing nobody tells you though – freeing them gives you no extra reward. They’ll wander off attacking bandits of their own accord, and community guides are fairly blunt that they can cause more problems than they solve. Do it for the roleplay, not the payoff.
- The loot. Ancient debris piles plus whatever’s on the corpses. Several camps have a dedicated loot room – Devil’s Thirst has one on the second floor of the central ruin, and one camp has a big pile sitting right where the Bandit Camp icon appears on your map.
- The permanent weather. A nice touch most people don’t consciously register. Camps sit under constant stormy weather until cleared, with two exceptions – the Gatelands camp runs a sandstorm instead, and Stone Yield gets heavy snow. Clear the place and the sky changes. That’s the game telling you something without a cutscene.
Now, what you get for tearing all that down.
What Clearing a Bandit Camp in Horizon Zero Dawn Actually Gets You
Three things, and one of them is worth more than the XP.
Experience. A large chunk, scaling with the camp’s difficulty. More on the specific figures shortly.
A permanent settlement. The camp converts into friendly territory, complete with a merchant setting up shop and villagers moving in. That’s a genuine change to your map, not a checkmark.
A campfire. Which means a fast travel point. In a game this size, a new fast travel node in a region you’ll be crossing repeatedly is arguably the most practical reward of the three.
There are also trophies attached – one for your first camp cleared, and one for taking back every camp in the base game. And clearing them all unlocks a final side quest from Nil called Cause for Concern – Farewell, which is where this whole side activity pays off narratively.
Worth being clear on the count, because it trips people up. There are six bandit camps in the base game, plus one more at Stone Yield added with The Frozen Wilds. The completion trophy only requires the six base-game camps.
The Doctrine: A Repeatable Five-Step Assault
Here’s the routine. It works on every camp with minor adjustments, and once it’s muscle memory you’ll clear a camp in ten minutes without the alarm ever going off:
- Step one: circle before you commit. Walk the perimeter from outside the spike rings. Don’t enter. You’re looking for the towers, the gate guards, the alarm, and any hole in the wall.
- Step two: tag everything with Focus. Scan and mark every enemy you can see before you touch anything. This is the step people skip and then regret, because a bandit you didn’t tag is a bandit standing behind you.
- Step three: kill the towers first. Precision arrows from a Sharpshot Bow handle tower snipers easily and quietly. Take them out before anything at ground level, because they’re the ones with sightlines on you.
- Step four: shoot the alarm. Once you’ve thinned the outer patrols, put an arrow in it. From that point on the camp can’t call for reinforcements and the whole fight becomes consequence-free. Every good guide says the same thing, and it’s the single biggest difficulty lever in the activity.
- Step five: work inward with Silent Strike. Tall grass, patrol patterns, one at a time. Prioritise anyone carrying something dangerous.
That last point deserves expanding, because heavy enemies are what actually kill people here:
- The rocket launcher bandit. At least one camp has an enemy with a heavy rocket launcher. Focus everything on him immediately – once he’s down, nobody else picks the weapon up, and the fight gets dramatically easier. If the alarm has already been raised, you can grab the launcher off his corpse and turn it on the rest of them.
- Heavy armored bandits. Some camps station these near the entrance. If you haven’t unlocked the relevant abilities, luring them into bushes won’t be enough on its own. Shock bombs are the community answer – stun them, then finish them.
- Club bandits. They hit disproportionately hard for regular enemies. Wear something with decent physical defence and don’t let them close.
One more habit worth building: after the alarm goes off, watch the main gate. Reinforcement groups spawn there, and getting flanked while you’re focused on the interior is how clean runs fall apart.
The Dossier: Camp by Camp
Right, the specifics. Rewards vary by camp and the community figures line up consistently across the major guides.
| Camp | Reported XP | The thing that’ll get you |
|---|---|---|
| Devil’s Thirst | 5,000 | Tower snipers; one alarm, two prisoners, loot room upstairs |
| Two-Teeth | 7,500 | The rocket launcher bandit – kill him first |
| Hollow Fort | 15,000 | Roughly 10-12 regulars plus around 10 leader enemies |
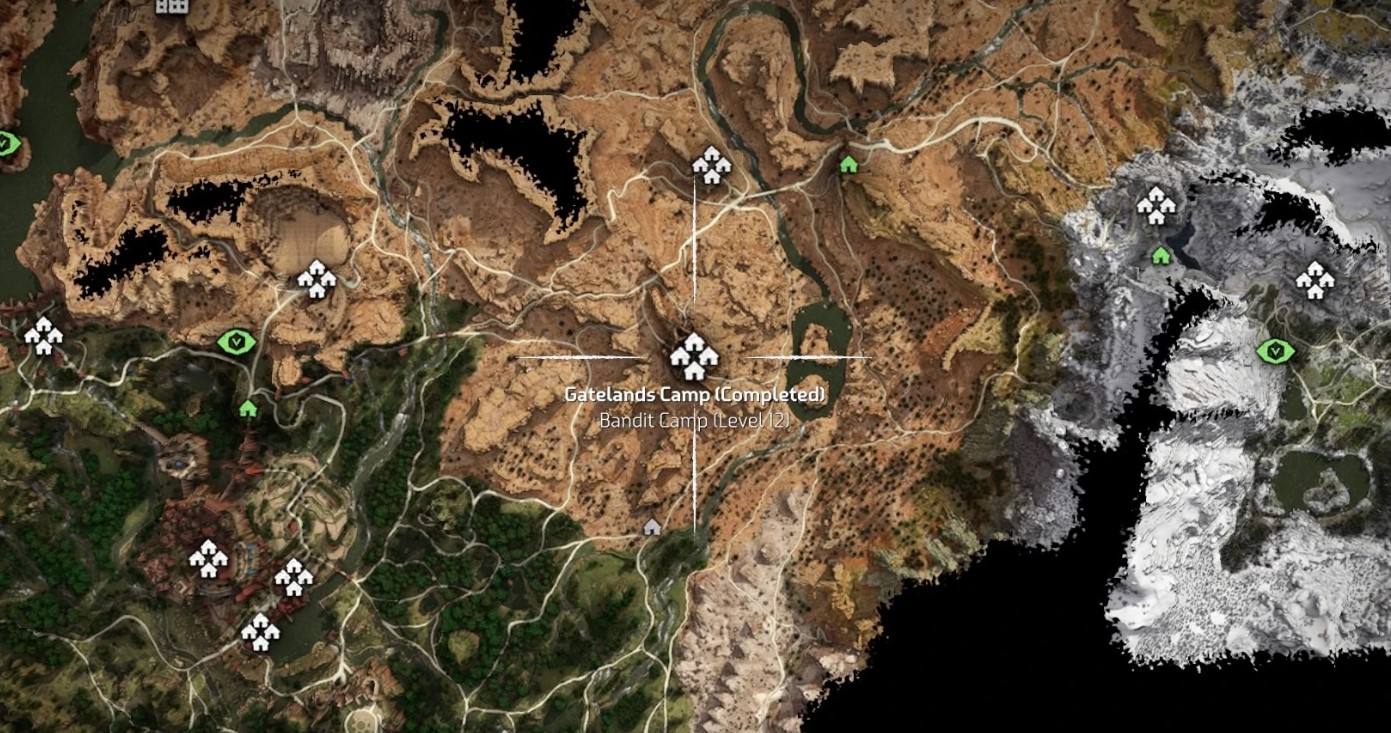
| Gatelands | 10,000 | Sandstorm weather; alarm on the far south edge |
| Blackwing Snag | 10,000 | Two prisoners southeast, big loot pile centre |
| Shattered Kiln | 15,000 | Large, tower-heavy, stronger bandits |
A few notes that don’t fit in a table.
Devil’s Thirst is your tutorial camp, and it’s structured like one. Four enemies patrolling outside the spikes to the north including a tower shooter, three more to the east with a second tower, gate guards at either entrance. The useful secret is a hole in the wall just south of the eastern watchtower, left of the gate, which lets you slip straight into the ruined building at the southern end. That’s your stealth entrance, and finding it makes the whole camp trivial.
Hollow Fort is the wall. Guides call it the hardest camp in the game and the enemy count explains why – a dozen regulars plus around ten leader-tier enemies, all of which get alerted if that alarm goes off. The alarm sits at the northwestern end. Prisoners are on the top floor of the main ruin to the north. If there’s one camp where you follow the doctrine exactly rather than improvising, this is it.
Gatelands is easier than its reputation, with a single elite plus regulars, but the sandstorm hurts visibility both ways. The alarm on the south edge is easy to miss on approach.
Shattered Kiln is usually the last one you’ll reach, and it’s structurally similar to Hollow Fort – big, open, stronger bandits, several perimeter towers. The northwest entrance is lightly guarded by a single patrol and one lookout tower, both removable from a nearby bridge, which gives you an unguarded gate to walk through before you shoot the alarm.
The Nil Question
Now the interesting part, and the one that’s actually a decision rather than a tactic.
Nil is the bandit hunter you meet north of the Main Embrace Gate, and he offers to come with you. At most camps you get a choice: bring him along or go alone.
The mechanical trade is straightforward. He genuinely helps – he’s real combat support, not a decorative escort. But he also takes kills, and kills are experience, so the XP you earn is reduced with him tagging along. Whether that matters depends entirely on your level relative to the camp. Underleveled and struggling? Take the help. Overleveled and farming? Go alone.
But the mechanical trade isn’t why people remember him.
Nil is one of the most quietly unsettling characters in the game. He hunts bandits, and the more time you spend with him, the clearer it becomes that the hunting isn’t really about justice. He enjoys it. The side quest chain built on top of the camps – culminating in Cause for Concern – Farewell after you’ve cleared them all – exists to make you sit with that.
Which recontextualises the whole activity, honestly. On paper “clear six outposts” is the most generic open-world checklist item imaginable, the kind of thing every game in the genre shipped in 2017. Attaching a companion who slowly reveals himself as someone with an appetite for killing turns busywork into something with a bad taste to it. You’re doing the same task, but the game keeps asking why you’re enjoying it.
Practical note if you’re chasing the trophy: talking to Nil is optional. Reports from trophy hunters confirm it can pop without ever speaking to him. Which brings us to the thing that’s caused more forum threads than any tactical question.
Trophy Trouble With the Bandit Camp in Horizon Zero Dawn
If you’ve cleared all six and the trophy hasn’t fired, don’t assume it’s broken. There’s a common cause and it’s fixable.
The camps are quests, and a quest isn’t finished just because the last bandit died. At several camps you have to return and speak to Nil to formally complete it. Multiple players have reported clearing everything, seeing no trophy, checking their quest tab, finding two bandit camp quests still marked unfinished, talking to Nil, and having the trophy pop immediately.
So the checklist when it doesn’t unlock:
- Open the quests tab and look at the bandit camp entries specifically. Any still listed as active?
- If one is, go back to where you spoke with Nil and finish the conversation.
- Confirm you’ve done all six base-game camps – Stone Yield from The Frozen Wilds doesn’t count toward this one.
- Double-check you actually killed every bandit. A single survivor tucked in a corner keeps the quest open.
Genuine glitches happen and a few players have reported them, but the quest-not-formally-closed explanation covers the overwhelming majority of cases.
FAQ
How many bandit camps are there?
Six in the base game, plus one more at Stone Yield added by The Frozen Wilds. Only the six base-game camps count toward the completion trophy.
What do I get for clearing one?
A large XP payout, a merchant and villagers moving into the liberated settlement, and a campfire you can fast travel to. Plus trophy progress and, eventually, a final Nil side quest.
Should I bring Nil along?
Depends on your level. He’s real combat help, but he takes kills and reduces your XP. Underleveled, take him. Comfortable, go alone.
Is freeing the prisoners worth it?
Not mechanically. There’s no extra reward, and freed prisoners run off attacking bandits on their own, which can complicate a stealth run more than it helps.
Which camp is the hardest?
Hollow Fort, by a clear margin. Roughly 10 to 12 regular enemies plus around 10 leader-tier ones, all of whom come running if you set off the alarm.
How do I stop the alarm?
Shoot it with an arrow. Do it early, before it gets triggered, and the camp can’t summon reinforcements for the rest of the fight.
Why hasn’t my trophy unlocked?
Usually because a camp quest was never formally closed. Check your quest tab for outstanding bandit camp entries and go finish the conversation with Nil.
Closing Thoughts
Strip a bandit camp in Horizon Zero Dawn down to its parts and it’s the most conventional thing in the game – spike rings, watchtowers, an alarm, cages, loot. Learn that blueprint once and the doctrine transfers to all six: circle, tag, towers, alarm, silent strikes, and never let the rocket launcher guy live. What lifts the activity above its genre is everything bolted around it, from the storm breaking the moment you’re done to the hunter standing beside you who’s a little too pleased about the work. That’s Guerrilla’s trick throughout the game, really. The checklist is ordinary. What they hang on it isn’t.
P.S. If this turned six identical outposts into something you can clear on autopilot, sending it onward is the easiest favour you can do our small crew. Bookmark it as well, because the trophy troubleshooting section is the sort of thing you’ll only need once, at the exact moment you’re too annoyed to go looking. And if creative or commercial collaboration is your reason for being here, the Lizet Manski team welcomes a direct message any time.