
Best Way to Catch a Rat in Resident Evil 4 Remake for Easy Spinels
Picture this. You’re creeping through Saddler’s creepy castle, nerves frayed, expecting a Regenerador to lurch out of the shadows – and instead you hear this tiny, mocking skitter-skitter somewhere near your feet. A rat. And the Merchant wants it dead.
Welcome to the most oddly frustrating side quests in the whole game.
Here’s the deal. The best way to catch a rat in Resident Evil 4 Remake isn’t obvious, and plenty of players have wasted ammo, herbs, and their sanity chasing these little pests around dark rooms. They spook when you get close. They never stand still. And they blend into the grimy environments like they were designed to troll you. Sound familiar?
Don’t sweat it. These Pest Control requests are actually quick and rewarding once you know the trick. So let me walk you through exactly how to bag every rat, which weapons to use, where each one hides, and the little tips that make the whole thing painless. Those Spinels are basically free money once you’ve got the method down.
What Are the Rat Requests Anyway?
Quick bit of context first, because if you’re new to the Remake, you might not even know why you’re hunting rodents in a survival horror game.
The RE4 Remake added a fresh system called Merchant Requests – optional side quests pinned on blue notes near the Merchant’s stalls. These tasks range from destroying blue medallions to smashing Clockwork Castellans, and yes, exterminating rats. Complete them and the Merchant rewards you with Spinels, a special currency you spend on weapon attachments, treasure maps, exclusive upgrades, and more. They’re well worth grabbing.
Three specific requests task you with hunting rats, and they escalate as you go:
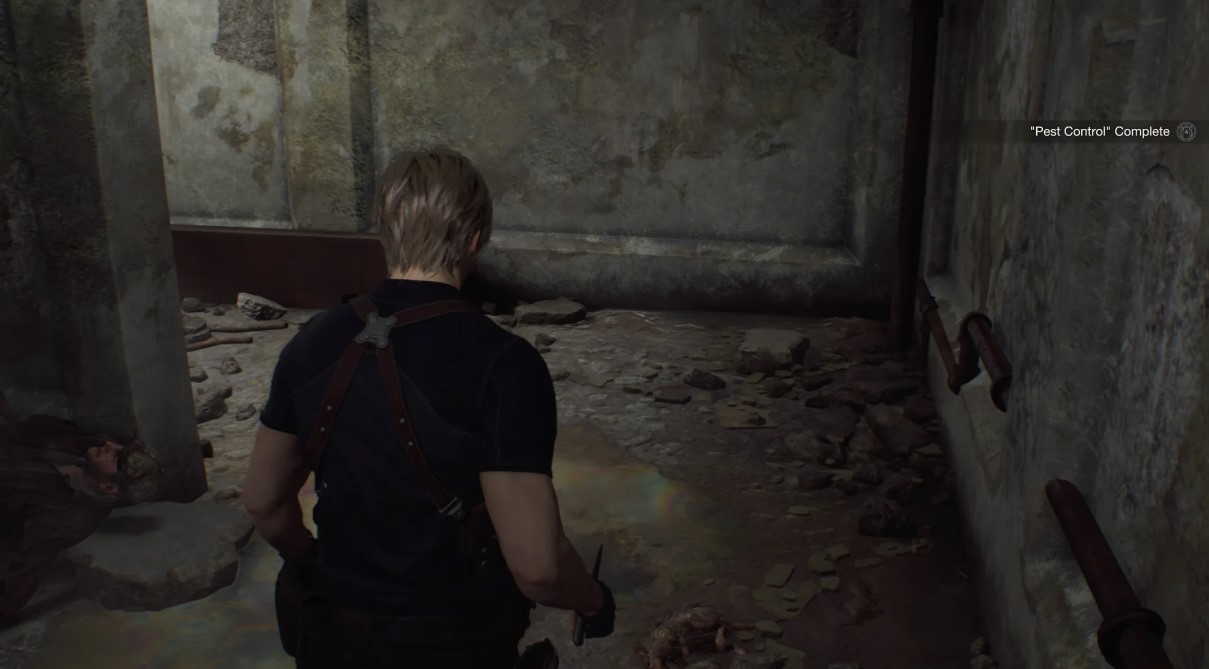
- Pest Control – your first rat hunt, found in Chapter 2, requires killing 3 rats.
- More Pest Control – the Chapter 9 sequel, also 3 rats, spread across the castle.
- Even More Pest Control – the Chapter 14 finale, bumps it up to 4 rats in the Waste Disposal.
Here’s a handy detail that saves time: you don’t actually need to grab the request note before killing the rats. If you spot and squash a rat before picking up the blue note, it still counts. The game tracks it regardless. So don’t panic if you wander past one early – you can kill them on sight and grab the note whenever.
Now, onto the part everyone actually struggles with. Actually hitting the little buggers.
The Best Way to Catch a Rat in Resident Evil 4 Remake: Weapons
Let’s cut to the chase. The single most important thing to understand is this – rats die in one hit from basically anything, so never waste good ammo on them. They have no health to speak of. The challenge is purely about connecting your shot before they scurry off.

The community has landed on a clear consensus for the best tools:
- The knife – completely free, silent, and one slash ends a rat instantly; ideal when you can corner one.
- The Bolt Thrower – the crossbow-style weapon whose bolts are recoverable, so you spend zero resources.
- The handgun – reliable for picking off a rat from a safe distance before it notices you.
That’s the golden trio. Guide writers across TheGamer and Shacknews specifically recommend the Bolt Thrower or knife precisely because rats die in a single shot, making anything more powerful a total waste. One well-known guide put it plainly: since it only takes one shot to kill them, there’s no point wasting ammo.
Here’s the strategic split, and it matters more than you’d think. If a rat is far away or in an open space, pop it with your handgun or a bolt from range before it spooks. If a rat is close or has wedged itself into a corner or hallway, just walk up and knife it. The knife is honestly the MVP here because it costs nothing and never misses at melee range.
A word on the Bolt Thrower, since the community is divided on it. Some players find its slow reload and aim time frustrating for combat, and Steam threads are full of people who bought it, hated it, and sold it. But for side-quest critters like rats and crows? It’s genuinely handy because you recover your bolts. So even if you don’t main it, keeping it around for pest control is a smart move.
How Rats Behave (And How to Outsmart Them)?
Understanding rat behavior is half the battle. These aren’t stationary targets – they’re skittish little sprinters, and knowing their patterns turns a frustrating chase into a clean one-shot.
The key fact: rats spook and flee the moment you get too close. Approach carelessly and they’ll bolt into a hole or across the room, forcing you to chase. That’s where most players lose patience. The trick is to spot them from a distance and take the shot before they clock your presence.
They also roam constantly within a set area rather than sitting in one exact spot. So guides can only point you to the general zone where a rat wanders, not a pixel-perfect location. Listen for that telltale scurrying sound – it’s your best clue. In darker rooms, you’ll often hear a rat before you see it.
Here’s a genuinely useful community tip for the dark areas: use a scope or your flashlight to spot rats hiding in the gloom. For the Chapter 14 Waste Disposal rats specifically, players discovered you can use a Biosensor Scope to peer through a gate and spot the rats in the dark room, saving you a long detour across the bridge. Clever stuff.
And one more behavioral quirk that works in your favor: rats sometimes get stuck in narrow hallways or against walls. When that happens, they’re sitting ducks. If a rat is being elusive, try to herd it toward a dead end or wait near a chokepoint where it’s likely to get pinned.
Every Rat Location Broken Down
Alright, let’s get specific. Here’s where to find all the rats for each request, pulled together from community guides. I’ll keep it tight so you can hunt efficiently.
For the Pest Control request in Chapter 2, the note sits by the first Merchant stall after you escape the Abandoned Factory – but you’ve actually passed the rats already, so head back into the factory.
| Rat | Location |
|---|---|
| Rat 1 | The long hallway with the broken wall, where an enemy shuffles about |
| Rat 2 | Just outside the two broken windows you jump through, near boxes and debris |
| Rat 3 | In the same room, look toward the ovens |
Kill all three, return to the Merchant, and pocket your three Spinels. Easy.
For the More Pest Control request in Chapter 9, the note is near the goat/snake/lion statue by the Dining Hall door. These rats are castle-based:
- Dining Hall rat – running around on the carpet right as you enter, or in the hallway just before.
- Armory rat – hiding near the Armory, often stuck in a nearby hallway; use your flashlight to spot it.
- Mausoleum rat – in a hallway near where you start as Ashley, though you can only kill it once Leon is freed.
For the Even More Pest Control request in Chapter 14, grab the note on a crate near the Merchant east of the Waste Disposal. This time it’s four rats:
- Rat 1 – right after entering the main Waste Disposal area, look at the ground near the boxes.
- Rat 2 – near the bridge Ashley raises; it often waits behind a wall on the far side.
- Rats 3 and 4 – beyond the long bridge, in the area with the power control lever, close together in the dark room.
For that final dark room, remember the scope trick – you can spot rats three and four through the gate rather than trekking all the way around. Turn in all four and you’re done with the Pest Control saga for good.
Common Mistakes That Waste Your Time
Let me save you some grief, because these blunders trip up loads of players. And they’re all easily avoidable.
The biggest mistake by far is using powerful ammo on rats. Please, please don’t blast a rat with your shotgun or magnum. It’s total overkill and a criminal waste of scarce resources in a game where ammo is precious. A knife or a single pistol round does the exact same job. Save the firepower for the actual monsters.
Another classic error is rushing straight at the rat. As covered, they flee when you approach. Charging in just sends them scattering and turns a five-second kill into a two-minute chase around the room. Slow down, spot them from range, and take a calm shot. Patience genuinely pays here.
People also panic when they can’t find a rat visually. Remember to use your ears – the scurrying sound is a dead giveaway. And in dark rooms, pull out your flashlight or a scope. Fumbling around blind is the slowest possible approach.
Finally, some players stress about grabbing the request note first. You don’t need to. Kill any rats you happen across, and they’ll count toward the request when you pick up the note later. So if you spot a rat mid-exploration, just squash it then and there rather than backtracking pointlessly.
Why Bother With the Rats At All?
Fair question. Chasing rodents isn’t exactly the power fantasy Resident Evil sells you. So are these requests actually worth your time?
Honestly? Yes, and here’s why. The Spinels you earn are a genuinely valuable currency. You can spend them on exclusive weapon upgrades, extra treasure maps that reveal hidden loot, larger Attaché Cases, and other goodies you can’t easily get otherwise. For a few seconds of rat-squashing, that’s a fantastic return on investment.
There’s also the completionist angle. If you’re chasing the platinum trophy or just want to wring every bit of content out of your playthrough, the Pest Control requests are mandatory box-ticks. And they’re among the easiest requests in the game once you know the locations, so there’s really no reason to skip them.
Think of it this way – the rats are a tiny, low-stakes break from the tension of dodging Garradors and parrying chainsaws. A quick knife slash, a satisfying little reward, and you’re back to the horror. Not a bad deal at all.
FAQ
What’s the best weapon to catch a rat in RE4 Remake?
The knife is best for close rats since it’s free and one-shots them. Use the Bolt Thrower or handgun to pick off rats from a distance before they flee.
Do I need to pick up the request note before killing rats?
No. Rats you kill before grabbing the blue note still count toward the request, so you can squash them whenever you spot them.
Why do the rats keep running away?
Rats spook and flee when you get too close. Spot them from a distance and take your shot before they notice you approaching.
How many rats are there in total?
Nine across three requests: three in Pest Control (Chapter 2), three in More Pest Control (Chapter 9), and four in Even More Pest Control (Chapter 14).
What reward do I get for the Pest Control requests?
You earn Spinels, a currency used to buy weapon attachments, treasure maps, larger cases, and other useful items from the Merchant.
How do I find rats in dark rooms?
Use your flashlight or a scope like the Biosensor Scope. You can even spot the Chapter 14 rats through a gate to avoid a long detour.
Should I waste ammo on rats?
Never. Rats die in one hit from anything, so a knife or single pistol shot is plenty. Save your shotgun and magnum ammo for real enemies.
Wrapping It Up
So there’s your complete rundown on the best way to catch a rat in Resident Evil 4 Remake. The whole thing boils down to a few simple truths: rats die in one hit, they flee when you rush them, and a knife or a well-placed ranged shot is all you’ll ever need.
My honest advice? Keep the knife handy for cornered rats, use the Bolt Thrower or handgun for the ones at range, listen for that scurrying sound, and light up dark rooms with your flashlight or scope. Nail those habits and the Pest Control requests go from annoying to trivial. You’ll be swimming in Spinels in no time.
The rats might be the game’s cheekiest little nuisances, but they’re also some of its easiest rewards once you crack the method. Now go show those vermin who’s boss – the Merchant’s got Spinels waiting, stranger.
P.S. If this guide helped you bag those pesky rats, please support us by sharing the post across your social media and adding it to your bookmarks so it’s easy to find later. Every share genuinely helps our team keep guides like this coming. And if you’re seeking creative or commercial collaboration, feel free to write to the Lizet Manski directly – we’d love to hear from you.